Advanced Text Properties Dialog
Description
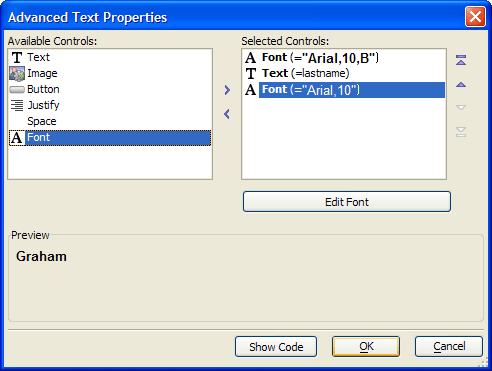
You use the Advanced Text Properties dialog to define a sequence of statements that will display text, data, buttons, or images.
To create a display statement:
Select an item from the Available Controls list and click '>' to add it to the Selected Controls list. The options are:
"Text"
"Image"
"Button"
"Justify"
"Space"
"Font"
Add as many additional controls to the Selected Controls list as you need to construct the desired display statement. Each time you add a control to the Selected Controls list a properties dialog will appear to further define the control.
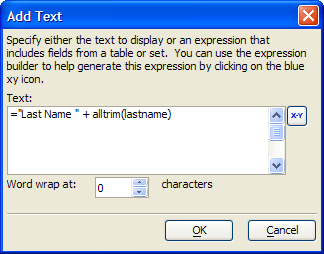
The "Text" control displays the Add Text dialog.
Enter static text with quotes ( "Last Name " ) and references to fields as expressions ( alltrim(lastname) ). Optionally, click to display use the Expression Builder to compose a character expression.
Optionally, set a value for word wrapping the display statement. The default value of 0 does not word wrap.
Click OK to save your inputs and return to the Advanced Text Properties dialog.
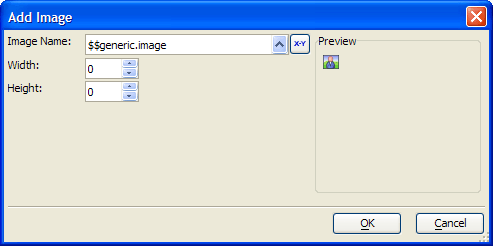
The "Image" control displays the Add Image dialog.
1. Enter the name of the image into the Image Name control, or click 'up' to select an image with the Insert Image dialog.
2. Optionally, click 'xy' to display use the Expression Builder to compose a character expression that resolves to an image name.
3. Optionally, resize the image by setting values in the Width and Height controls. The default values of 0 display the image at its normal size.
4. Click OK to save your inputs and return to the Advanced Text Properties dialog.
The "Button" control displays the Add Button dialog.
The "Justify" control displays the Add Justification dialog. By default, the justification of the display contents will be set by the parent layout.
1. Select a justification mode. The options are:
"Center"
"Left"
"Right"
2. Click OK to save your inputs and return to the Advanced Text Properties dialog.
The "Space" control displays the Add Space dialog.
1. Enter the number of spaces to insert. The default is 1.
2. Click OK to save your inputs and return to the Advanced Text Properties dialog.
The "Font" control displays the Add Font dialog.
Optionally, use the buttons to re-sequence the formatting steps of the display statement.
Optionally, select any control in the Selected Controls list and click the Edit button to respecify its properties.
Optionally, click Show Code to see the Xdialog formatting expression that you have created.
Click OK to save your changes and return to the calling dialog.
Limitations
Desktop applications only.


